embellishments
Now that you know how to make a basic pen, it’s time to discuss how we can add a little extra bling. Personally I like the elegance of a simple design in a pen, but there are many options if you would like to try something different.
side note: these examples are merely to show techniques. they aren’t made to look beautiful and aren’t finished to a high degee. Some pictures will have some dust or paper particles in them.
Texture
you can add texture by simply using a parting tool and/or a buring wire to get some dark lines. This could add a nice effect to highlight a part of the pen or add some extra grip near the tip.
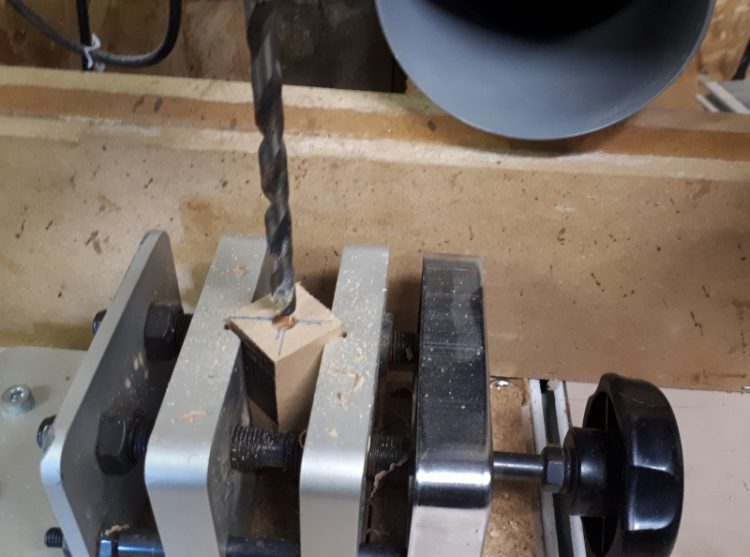
Another way to add texture is carving, you can use hand carving gouges although that might be tricky on the thin slimline pens or a rotary tool such as a Dremel. the only limit here is the thickness of the wood around the tube.

Finally you can use a texturing tool on the lathe. These tools have free spinning wheels with different teeth sizes. Depending on the angle you present them to the workpiece you can achieve many nice patterns. This too might be tricky on the thin slimlines but it doesn’t hurt to try. There are also texturing tools with a vibrating tip (sort of a scraper), but I wouldn’t advise using them. They are almost certain to grab the wood and pull chunks out.


Laser engraving and burning
A great way of personalizing your pens is by burning names or text into them. You can do this free hand at a very low cost. There is a wide range of pyrography tools available from 10 euro to several hundred euro. Either end of the spectrum can get nice results depending on the tip you use and if you have a steady hand or not.


The second and more repeatable option is to use laser engraving. Now you don’t need a high end machine for this even the cheapest (chinese) clones will work fine. In my experience the cheaper the machine the more work you have to put in to setting up the software and the machine. Once it’s dialed in however you’re good to go. It’s a good idea to practice engraving (and other embellishments) on some dowels first so you can see what it will look like on a cylindrical surface. Another great test would be to do the engraving on a offcut piece of the material you used to make your pen. The engraving might be too light/dark depending on the density and type of material.

randomly placed clover pyrography with varying pressure applied
When you really want to go all in, you can add a 4th axis or a DIY alternative for it. This will rotate the pen instead of moving the gantry of the machine. That way you can engrave rings 360° around the pen. That might also be possible to do without the 4th axis by cutting the image in 4 pieces and engraving them one by one, rotating the pen 90° in between each engraving. This will however require a lot of trial and error and could lead to misalignment in the ring and thus a ruined work piece. But it might we worth exploring.
Inlay
You could leave the burning, engraving or texturing as is or you can take it one step further and fill them in with some inlay material. The best options here are Milliput, metal powder and resin.
Milliput
Milliput is a two part expoxy putty that dries rock hard. There are several colors available (white, black, silver, terracota, turqoise) so you could mix and match it to the color of you base material. The best way to to it is add a generous amount of the putty and sanding it back afterwards.


Metal powder
The (real) metal powder is sold is small packages, usually aluminium, brass and copper are readily avaible, but I’m sure others can be found. The power is added into the engraving and set with thin/medium CA glue. When the glue is cured you can sand it down again. There is also a wide range of other powders available like stone varieties and glow in the dark powder.
The picture on the left shows the result of a (sloppy) test on a 7 mm pen part. Since this is a close up you can see that the brass inlay isn’t very smooth. this is because these tests were only finished with a 120 grit sandpaper. you can get these perfectly smooth, but this article is focused more on the technique.
Similarly the white Milliput inlay ring has some specs of the brass inlay. These wouldn’t occur in a real project obviously.
Resin
resin casting has become extremely popular the last couple of years and has turned into a hobby itself. you could fill the engraving with resin in all it’s possible colors and sand it back later. However since the pens are so small, this might be a messy and lengthy process.
Paint or Stain
Obviously you could paint or stain the pen. This might be a nice option to have kids decorate their own pen or in case of the stain to bring out the grain a bit more.
Metal leaf
Apart from the metal powder you can buy packet of extremely thin leaves of metal. These are usually in silver, copper or gold and could be imitations or the real thing. So depending on the amount of bling and money you want to spend, you could go for the real deal. Real or fake, the metal is added by first applying a layer of size, which is a type of glue. This is allowed to dry until it becomes sticky and usually clear, whereas the wet size is white colored. After gently applying the metal leaf, you can use a paint brush to get rid of wrinkles. When this has dried you can apply your finish.


Reactive paint
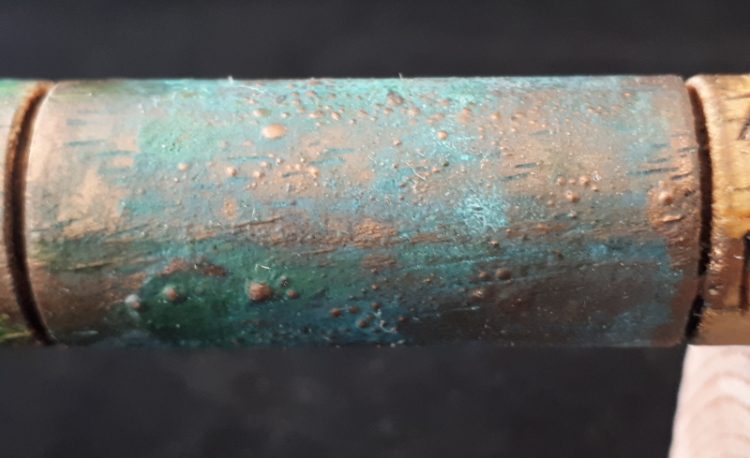
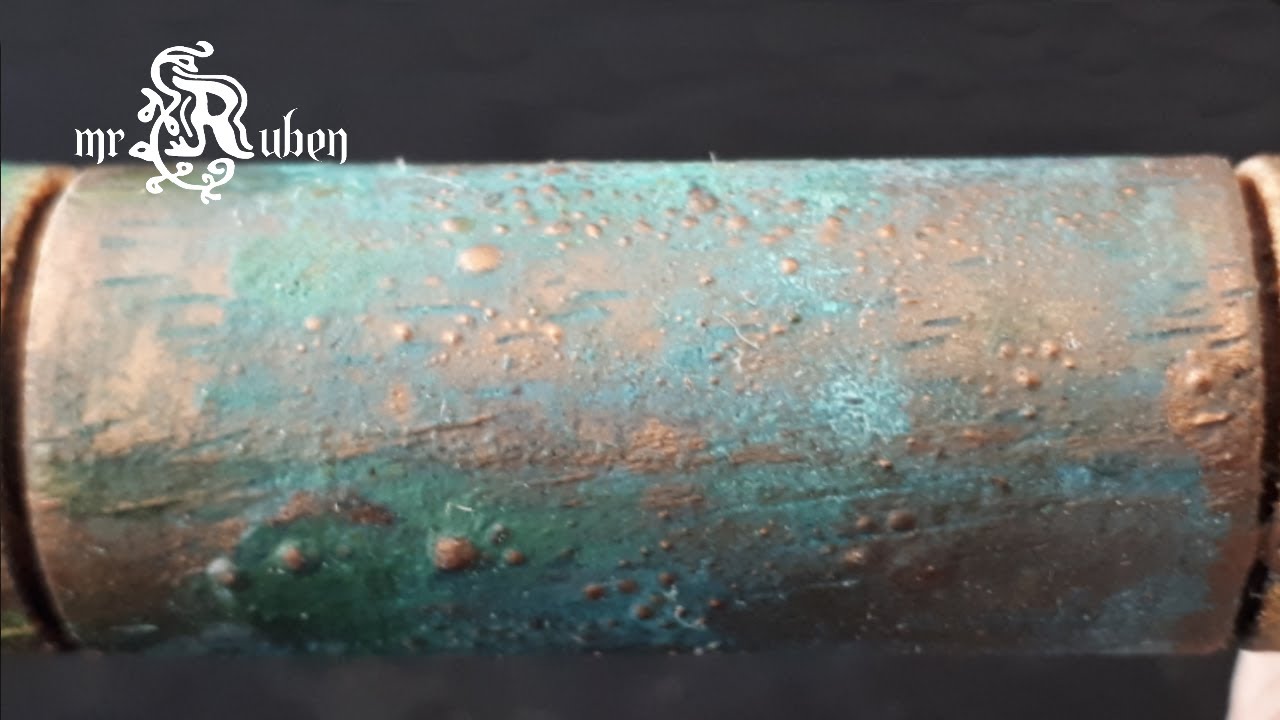
One last metal type embellishment is a reactive paint that results in an oxidized or rust effect. these can be found mostly in bronze and copper. The results are beautiful and combine well with the metal leaf of the same type. The metal part of these kits is simply painted on like a any other type of paint. when the first coat is dry, a second coat is added. With the second coat still wet a chemical activator is applied which oxidizes the metal in the paint. you can apply this chemical with a sponge or crumpled piece of paper to get a somewhat random pattern. Don’t forget to wear gloves the chemical may cause irritation to your skin.
The when the chemical reaction is done, most of the part will have the patina as you can see in the pictures below. You can gently sand this off with a high grit sandpaper to get your desired result.

Another technique you can apply here is heating/burning the first coat of metallic paint as it is drying. Carefully do this with a torch and you will get small bubbles in the paint. The end result gives you more texture as shown in the picture below.

Have you tried any of these methods or perhaps others? Which ones are your favorites? Let me know in the comments, via mail or Instagram. I’m always interested in seeing the work of others and getting new ideas.
Hey just wanted to give you a quick heads up. The text in your content seem to be
running off the screen in Ie. I’m not sure if this is a format issue or something
to do with web browser compatibility but I figured I’d post to let you know.
The design look great though! Hope you get the issue resolved soon. Thanks
Thank you for letting me know. I’ll get that fixed soon.