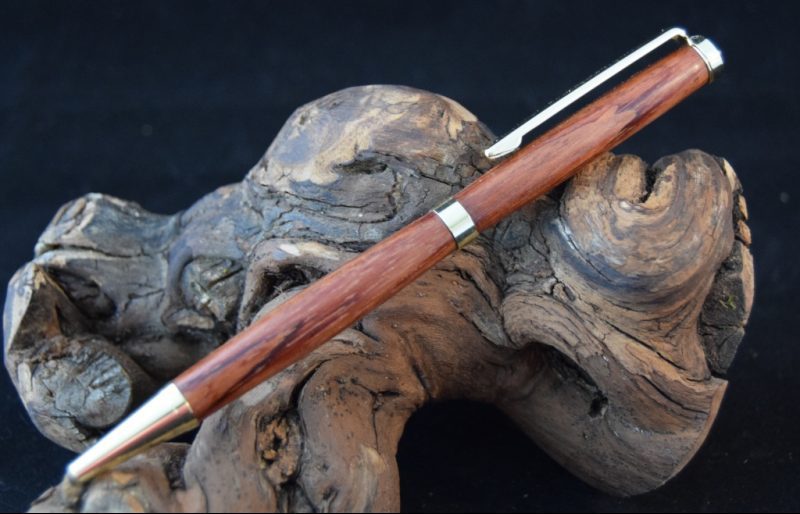
Overview on making a basic pen
In the first part of this series I’ll show you all the steps involved into making a basic slimline pen. I’m using this as the kits are the easiest to find and make. The parts you have to make are identical so this keeps it nice and simple. Some other pens have different tube sizes or lengths or might require a different radius between the start of the tube and end.
Please inform yourself on how your power tools work or seek out instruction on the basics of wood turning. Accidents do happen and you are responsible for your own safety.
A slimline pen kit (and many others) consist of the following parts:

- A – 1 end cap
- B – 2x 7mm brass tube
- C – 1 transmission
- D – 1 decorative ring
- E – 1 pen tip
- F – 1 ink filling
- G – 1 clip

Once you start buying other kits or even roller balls and fountain pens the parts will vary, but these are the most common ones.
The video
Tools – required and optional
As this is a guide for wood turners I’m assuming we’ll use a lathe to make our pen. There are however people that make pens using a drillpress and rasps/files/sandpaper or a cordless dill. I guess you could even use a draw knife or a plane to make a pen. As I mentioned it’s a basic project and many roads will lead to the desired result.
I’ll split up the list of tools into required and optional since you can accessorize all you want. My suggestion would be to start with the basic tools and buy some or more optional ones, once you start making more pens.
basic tools
- any size lathe
- pen mandrel OR centers for between center turning
- turning tools: spindle roughing gouge, skew chisel or even carbide tools
- sandpaper (at least 120, 240 and 400 grit)
- you choice of finish
- safety equipment: a face shield (safety glasses are not enough!) and a dust mask
basic tools – for each type of pen kit
- set of bushings (regular for the mandrel or between center ones)
- drill(s) -> some kits may require multiple drills
optional tools
- pen mill
- pen tube assembly tool
- pen disassembly kit (a set of punches)
- pen gripper pliers / thongs
- set of high grit sanding pads (for instance micro mesh)
- pen mandrel saver
- pen press
- drill chuck (for drilling on the lathe)
- jacobs chuck (for drilling on the lathe)
- drill center (for drilling with drill press)
- many more I’m sure …
TIP I recommend the pen mandrel saver as a good optional tool. It will prevent you from bending the rod in the pen mandrel when you over tighten the tail stock.
Drilling pen blanks
I’ve seen a lot of debates, sometimes very heated, about drilling pen blanks. you can do it on the lathe itself, using a drill press or even by hand. Especially for segmented blanks or small size blanks it’s important to drill perfectly straight, so drilling by hand is not an option in my opinion.
If you have an accurate drill press, you can use that either with a homemade jig or a store bought drill center. All you really need is something to hold the blank and 90° while you are drilling.
If however you do not have a drill press, I’d say this is a no brainer and get yourself a Jacobs chuck. For holding the blank you can buy specialized drill chuck, but any 4 jaw scroll chuck with #1 jaws will work.
I already had a Jacobs chuck and a drill press, but opted for the latter to do the drilling. I sometimes make batches of pens and I find it easier to mount the blanks in the drill center and changing drill bits on the drill press.
The choice is yours, both methods have their fans and will drill a nice straight hole in your blank.
Gluing tubes
This is yet another topic that can spark heavy debate. This time it’s more about brands than methods, most pen turners use a thin or medium CA glue or a two part epoxy to glue depending on the blank.
I normally use CA glue, but if the blank is segmented with metals or a resin with strange materials in it, I find epoxy to be even stronger.
No matter what type of glue you end up using. You will want to sand the brass tubes with a course grit sandpaper. This makes a lot of small scratches in the surface, which allow the glue to grip even better. I’ve seen some kits that already have this preparation of the tubes. Trust me, it takes a bit of work, but it’s worth it in the end.
TIP CA glue’s are mostly the same. cheaper brands will likely only have one consistency, while more premium brands offer thin, medium and thick CA. They also usually have an activator which instantly sets the glue. Some brands even have colored CA glue for filling cracks.
Turning the pen
Now we’ve reached the actual turning part. You can turn the tubes to whatever shape you like as long as the ends match with the bushings. These bushings are the exact thickness of the parts in you pen kit. This ensures that when the assembly is done there won’t be any gaps or ridges between the blank and the center band, end cap or nib. Which is why this project is considered a beginner project. It’s the basics of all turning, turn a blank round and turn it to the thickness of the bushings.
That’s it. No, really that is all there is to it. However you will find challenges when you have crazy grain, segmented blanks of wood species with varying hardness and so on. Even if it is a straight forward turn, things might still go wrong. Remember you’re end result is only a few millimeters of material around the brass tube. The good news is mistakes can be repaired and sometimes lead to even better pens.
For instance when a piece of wood chips of at the end, you can use a parting tool to make a clean end to the tube. Then you can drill a hole in a new piece of wood that fits missing bit. After gluing you can remount the blank and turn it again. You would be surprised how many times that happens, even to very experienced turners.
Finishing
There are many finishes for wood turning and almost all are great for pens. I prefer non toxic ones as some people tend to put a pen in their mouth when they’re busy or need both hands.
some of my favorites are the Pens Plus friction polish from doctor’s Woodshop which is made with bees wax, Carnauba wax and walnut oil. Or just some (linseed) oil.

If you like the shiny finishes however nothing beats CA glue. use a plastic bag to protect your fingers (the pen kits usually come with a few) or gloves. Set the lathe to run on a very low speed and apply small amounts of glue at a time. You can hold a paper towel below your piece to rub the glue in gently.
Add as many coats as you like, the more you add, the stronger the finish will be. I usually add 1 or 2 coats of thin CA, followed by 2 – 4 coats of medium CA.
TIP Allow the glue to dry between layers and do NOT use activator as that can discolor the glue or leave it a bit brittle.

When you’ve added all the glue you want, you can start using fine/high grid sanding pads to get the shine you’re after. The most common brand on the market these days is Micro-Mesh which comes in a set. You use these pads to lightly wet sand (with water). After you’ve gone through all the grits, you’ll have a very durable and shiny finish. Just remember that some people prefer the more natural matte look that an oil or a wax results in.
TIP When going the CA glue route, remember that Micro Mesh has a set of pads designed for wood and a set designed for acrylics / resin.
Final Assembly
Now that our tubes have been finished it’s time to assemble the pen kit. This only takes a few minutes and can be done in a variety of ways.
the drill press
If you are already using the drill press for drilling the blanks, you could also use it to put the pen together. Just insert a bolt with a large head in the press put a piece of any soft material (soft wood, cork, felt or cutting mat) on the table and press the pieces in. An easy upgrade to this is to glue a bit of scrap leather or cork to the head of the bolt to prevent it from scratching you parts.
the pen press
A pen press is a simple horizontally mounted lever that pushes a rod out towards an adjusrable end stop. These stops can be flip up parts to allow larger partially assembled parts. This limits the motion needed to press the parts together. It also makes it easier to apply the right amount of pressure, so you don’t mess up the blanks.

a one handed clamp
One of the simplest tools to use is a quick clamp. If you’re into woodworking or even just general DIY, chances are you already have one. If you don’t it is the cheapest option, so not a bad place to start. There are many brands that manufacture them and even the cheapest ones will do the trick. It can be a bit finicky however to align the parts and you really need them to be perfectly aligned when pressing the kit.

the lathe
Finally you can use the lathe to assemble the pen. Any number of mounts will do.
What’s next
Now you have all the basic information you need to make pens. The basics are very simple, which is why this is usually considered a good beginner project for wood turners. However there are many aspects you can deep dive in to make more exclusive pens. from embellishing techniques such as engraving and inlay to making complicated segmented blanks. I’ll go over these techniques in the next parts of this series, but first I’ll go over each step in more detail. In the next part I’ll do a deep dive into the tools.
Resin pen turning